Customer Support
Add email to iOS device – Apple iPhone
In case you have created an email account through Plesk and want to manage it from your iOS device, such as an iPhone or an iPad, you can add it by following the steps below:
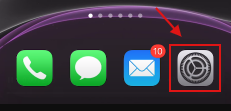
- On your device, locate the Settings icon and click on it.
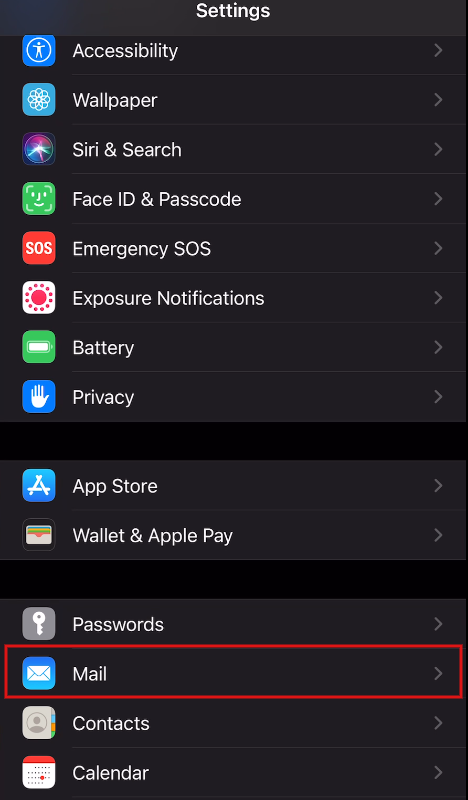
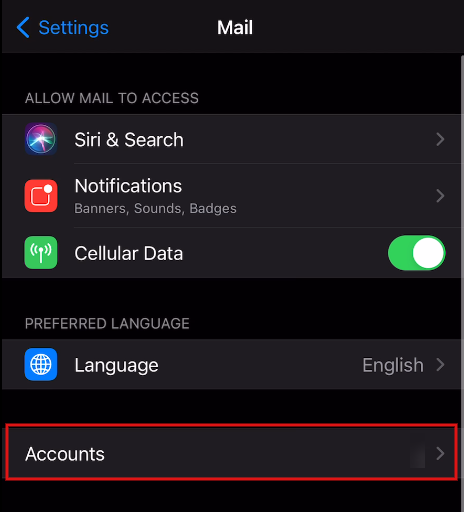
4. Click on Accounts.
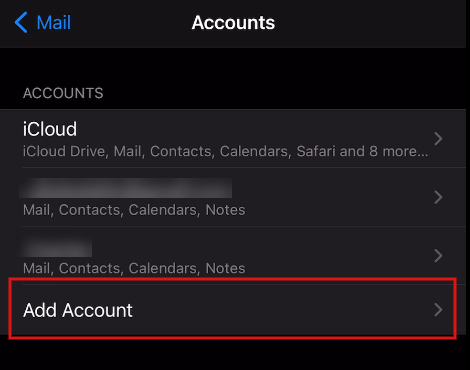
5. Επιλέξτε Add Account.
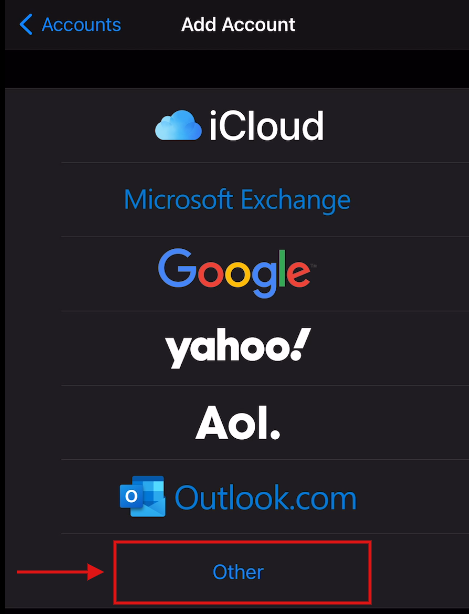
6. On the screen that appears, select Other.
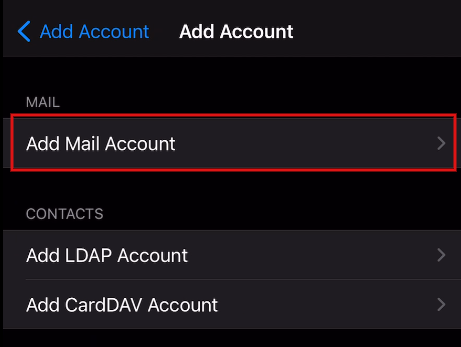
7. Then select Add Mail Account.
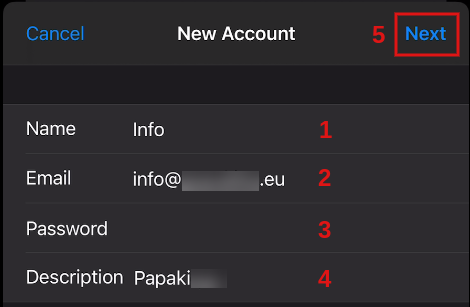
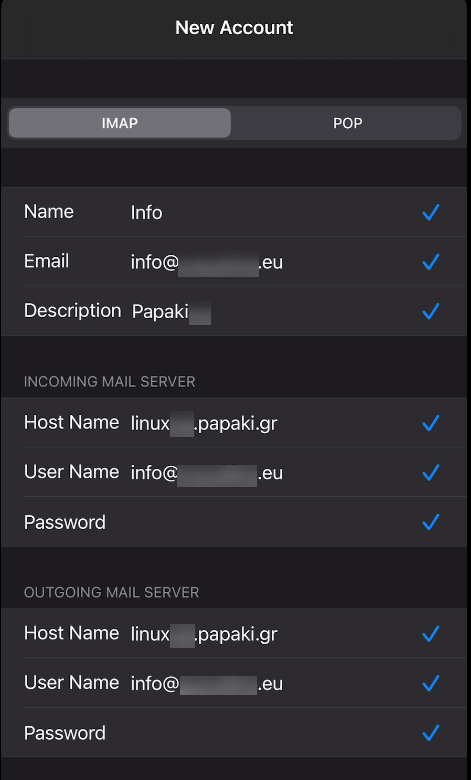
8. Fill in the following information:
-
Name: Enter the name of your email account
Email: Enter your full email address, eg info@yourdomain.tld
Password: Enter the password corresponding to your email
Description: Set a description with the name you want your email to appear on your device.
Select Next.
9. On the screen that will appear, select the type of IMAP or POP account you want. (In our example we will continue with IMAP.)
10. Then scroll to the bottom of the screen to fill in your incoming and outgoing mail settings.
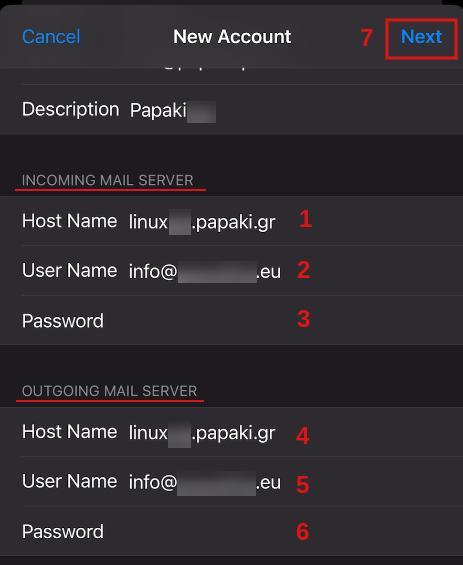
Host Name: state the incoming mail server (eg linux12.papaki.gr - see below how to find this value)
User Name: Enter your full email address, eg info@yourdomain.tld
Password: Enter the password corresponding to your email
For outgoing mail (OUTGOING MAIL SERVER)
Host Name: state the outgoing mail server (eg linux12.papaki.gr - see below how to find this value)
User Name: Enter your full email address, eg info@yourdomain.tld
Password: Enter the password corresponding to your email
Press Next.
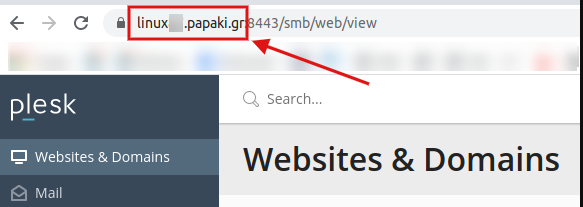
Note: You can find the value of the incoming & outgoing mail server after logging in to your Plesk, it is written at the top of the screen, in the URL line of your browser, eg linux12.papaki.gr. Caution, you must not copy port 8443.
11. After correctly filling all the above information corresponding to your account, the following screen will appear.
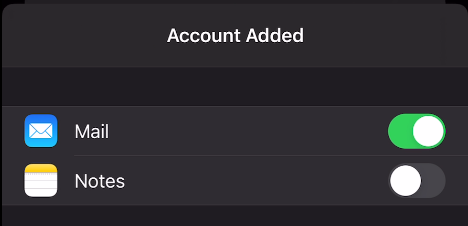
12.On the next screen select the applications you wish to connect to your email account and save your selections.
13.Then you will definitely need to set secure ports for incoming and outgoing mail. To do this, go to the Accounts window and click on the name of the email account you just added.
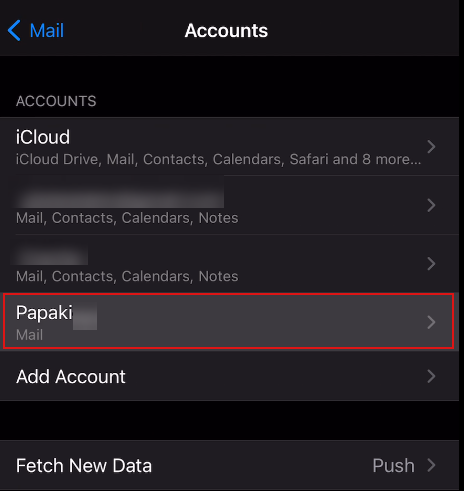
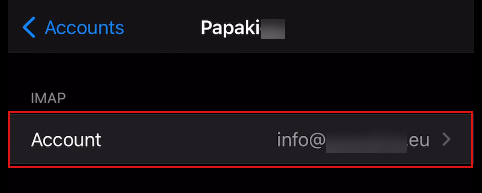
14. Select your account info@yourdomain.tld.
15. Scroll to the bottom of the screen and locate the Advanced option.
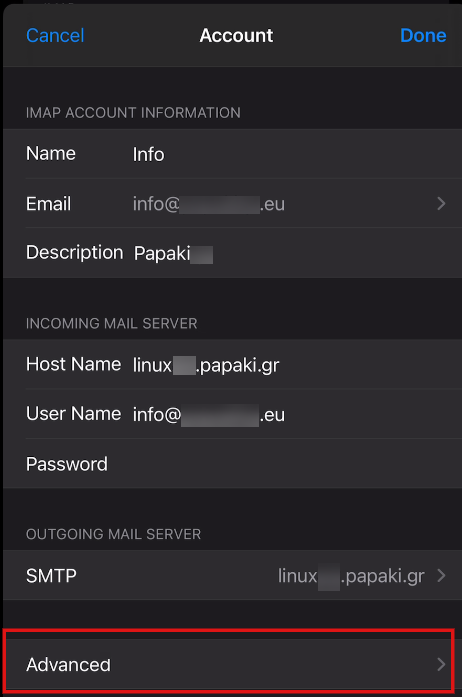
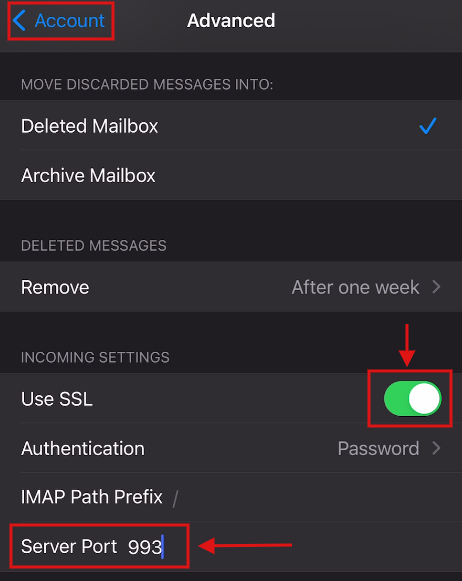
16. After clicking on Advanced, the incoming mail settings appear on the screen.
-
Enable the Use SSL option
Server Port: 993 in case of IMAP, 995 in case of POP
At the top left of the screen, click on Account to go to the previous menu.
17. Next, to set outgoing mail settings, select SMTP.
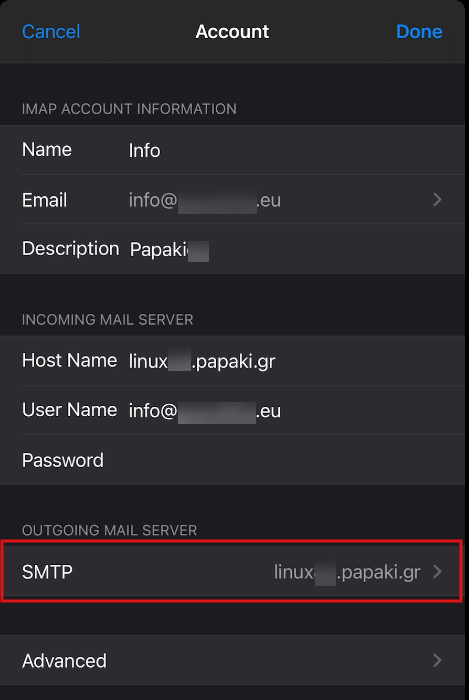
18. Click on the name of your mail server.
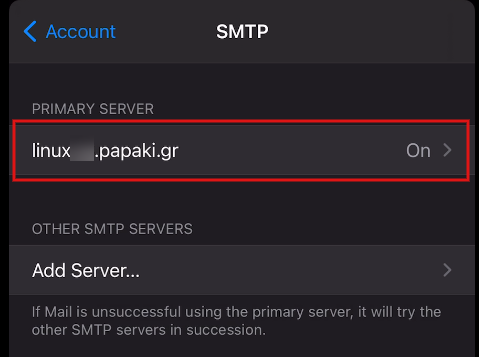
19. Outgoing mail settings appear here.
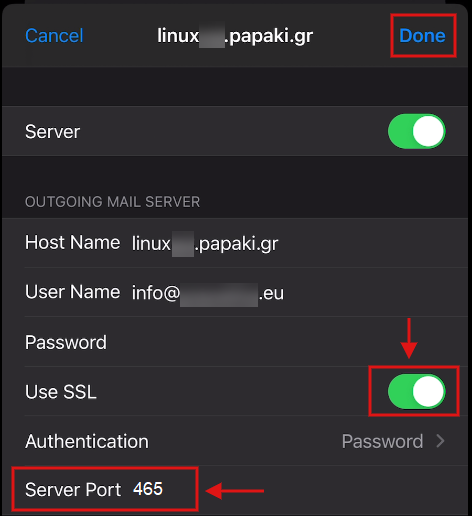
-
Enable the Use SSL option
Server Port: 465 or 587
Finally press Done.
As long as you have followed the steps above, your email account is now successfully connected!
You haven't found what you are looking for?
Contact our experts, they will be happy to help!
Contact us